How to take stunning night photos with a DSLR camera? Unlocking the secrets of nighttime photography with a DSLR opens up a world of creative possibilities. From breathtaking cityscapes ablaze with light to the serene beauty of a star-studded sky, mastering night photography empowers you to capture scenes unseen by the naked eye. This guide will equip you with the knowledge and techniques to transform your nighttime visions into captivating images, regardless of your current skill level. We’ll explore essential settings, gear recommendations, composition strategies, and post-processing techniques, providing a comprehensive pathway to mastering this rewarding photographic genre.
This journey will cover the core aspects of DSLR night photography, starting with understanding your camera’s capabilities and mastering crucial settings like aperture, shutter speed, and ISO. We’ll delve into choosing the right lenses and accessories, including tripods and remote triggers, essential for sharp, noise-free images. You’ll learn how to compose stunning shots using techniques like leading lines and the rule of thirds, and discover how to master focus in low-light conditions. Finally, we’ll explore post-processing techniques to enhance your images and tackle common challenges such as camera shake and noise. Whether you aim to capture cityscapes, starry nights, or stunning portraits, this guide will provide you with the tools to achieve stunning results.
Mastering Exposure Settings for Night Photography: How To Take Stunning Night Photos With A Dslr Camera

Night photography presents unique challenges, demanding a thorough understanding of your camera’s exposure triangle—aperture, shutter speed, and ISO. Mastering these settings is key to capturing stunning night shots, whether you’re aiming for vibrant cityscapes, the ethereal glow of a starry sky, or the dramatic silhouettes of a moonlit landscape. This section will guide you through the optimal settings for various night scenes and demonstrate how to utilize exposure bracketing for enhanced dynamic range.
Appropriate Aperture, Shutter Speed, and ISO Combinations for Different Night Scenes
The ideal exposure settings depend heavily on the specific scene and the desired effect. A wide aperture allows more light to reach the sensor, beneficial in low-light conditions, but it also reduces depth of field. A slow shutter speed captures more light, ideal for night scenes, but requires a stable camera to avoid blur. High ISO values increase sensitivity to light, but also introduce more noise. Finding the balance is crucial.
| Scene | Aperture | Shutter Speed | ISO |
|---|---|---|---|
| Cityscape (bright lights) | f/5.6 – f/8 | 1/30 – 1 second | ISO 100 – ISO 400 |
| Cityscape (dim lights) | f/2.8 – f/4 | 1 – 30 seconds | ISO 800 – ISO 3200 |
| Starry Sky | f/2.8 – f/4 | 20 – 30 seconds | ISO 3200 – ISO 6400 |
| Moonlit Landscape | f/4 – f/5.6 | 5 – 15 seconds | ISO 800 – ISO 1600 |
These are guidelines; you may need to adjust based on your specific camera and lighting conditions. Remember to always use a tripod for longer exposures to prevent camera shake.
Utilizing Exposure Bracketing for HDR Processing
Exposure bracketing involves taking a series of shots of the same scene at different exposures. This captures a wider range of tones and details, allowing for High Dynamic Range (HDR) processing in post-production. Your camera likely has a built-in bracketing function, typically allowing you to specify the number of shots and the exposure difference between them (e.g., three shots, each one stop apart). This technique is particularly useful for scenes with a significant contrast range, such as cityscapes with bright lights and dark shadows. The resulting HDR image will have richer details in both the highlights and shadows.
Effects of Different ISO Settings on Image Noise and Detail, How to take stunning night photos with a dslr camera
Increasing ISO boosts sensitivity to light, allowing for faster shutter speeds in low light. However, higher ISO values also increase image noise, which manifests as graininess or speckles. This trade-off necessitates careful consideration.
| ISO | Noise Level | Detail Retention | Suitable for |
|---|---|---|---|
| ISO 100-400 | Low | Excellent | Bright scenes, minimal noise |
| ISO 800-1600 | Moderate | Good | Dimly lit scenes, acceptable noise |
| ISO 3200-6400 | High | Fair | Very dark scenes, noticeable noise, requires noise reduction |
| ISO 12800+ | Very High | Poor | Generally avoided unless absolutely necessary; significant noise reduction needed. |
The acceptable noise level depends on your tolerance and post-processing capabilities. Noise reduction software can help mitigate noise, but it can also soften details.
Essential Gear and Accessories for Night Photography

Night photography demands specialized equipment to capture stunning images in low-light conditions. The right gear can significantly improve image quality, reduce noise, and allow for more creative control. This section will Artikel the essential tools and accessories that will elevate your night photography.
Recommended Lenses for Night Photography
Lens selection plays a crucial role in night photography. Different focal lengths offer unique perspectives and capabilities. A versatile kit will often include a wide-angle lens for capturing expansive night scenes and a telephoto lens for isolating distant subjects or capturing details.
- Wide-angle lenses (14-35mm): These lenses are ideal for capturing landscapes, cityscapes, and astrophotography. Their wide field of view allows you to encompass a broader area, making them perfect for capturing the grandeur of a starry night or the lights of a city skyline. A wider aperture (e.g., f/2.8) is highly beneficial for maximizing light intake.
- Telephoto lenses (70-200mm or longer): Telephoto lenses are excellent for isolating subjects at a distance, such as the moon, distant buildings, or even wildlife at night. They allow you to compress perspective and create visually compelling images. A fast aperture is advantageous here as well, enabling better low-light performance.
- Prime lenses (e.g., 35mm f/1.4, 50mm f/1.8): Prime lenses, known for their superior image quality and often wider apertures than zoom lenses, are a great asset for night photography. The wider apertures let in more light, resulting in brighter images with less noise, particularly beneficial when shooting in challenging low-light conditions.
Benefits of a Sturdy Tripod and Remote Shutter Release
A stable tripod and a remote shutter release are indispensable for night photography. Without these, camera shake is highly likely, resulting in blurry and unusable images.
The tripod provides a stable platform, eliminating camera shake caused by handholding the camera during long exposures. This is crucial, especially when using slow shutter speeds necessary for capturing sufficient light at night. A sturdy tripod, preferably one made of carbon fiber for lightness and stability, is recommended.
The remote shutter release prevents camera shake that can occur when pressing the shutter button manually. It allows for a clean, shake-free exposure, resulting in sharper images. Using a remote also enables time-lapse photography and long-exposure techniques.
Choosing the Right Lighting Accessories for Night Photography
While night photography often involves capturing ambient light, supplemental lighting can significantly enhance your images. The choice of lighting accessory depends on the specific scenario and desired effect.
- Flash: A flash can be useful for illuminating subjects in the foreground, adding detail and preventing them from becoming silhouettes against a bright background. However, using flash requires careful consideration to avoid harsh lighting effects. Consider using a diffuser to soften the light.
- External Lights (LED Panels, Continuous Lighting): These offer more control over lighting direction and intensity than a flash. LED panels provide continuous light, allowing you to see the effect of the lighting on your subject in real-time. They are particularly useful for illuminating landscapes, portraits, or architectural photography at night.
Composition Techniques for Stunning Night Photos

Mastering exposure is crucial for night photography, but equally important is understanding how to compose your shots for maximum impact. A technically perfect image can still fall flat if the composition isn’t engaging. This section explores key compositional elements and techniques to elevate your night photography.
Effective composition guides the viewer’s eye through the scene, creating a sense of depth, balance, and visual interest. By strategically employing various techniques, you can transform ordinary night scenes into captivating works of art.
Leading Lines in Night Photography
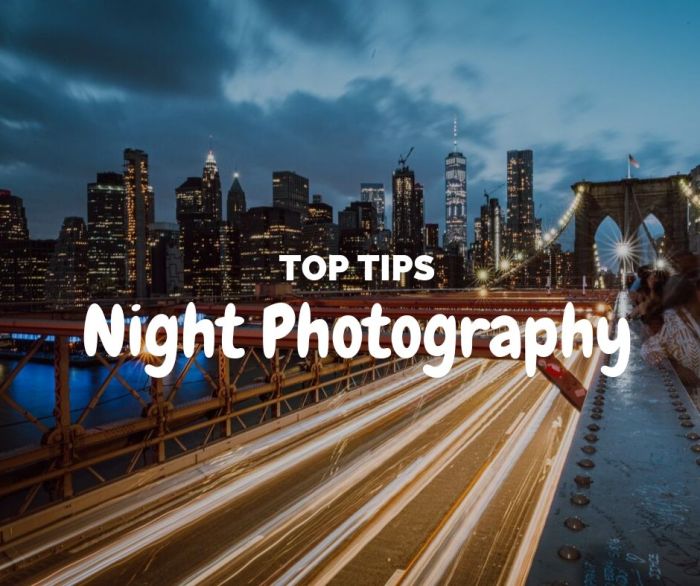
Leading lines are powerful compositional tools that draw the viewer’s eye into the image. In night photography, these lines can be created by city streets, rivers, fences, or even the lights of a long exposure trail. The lines should lead towards your main subject or a point of interest within the frame. For example, imagine a long, winding road stretching towards a brightly lit cityscape. The road acts as a leading line, guiding the viewer’s gaze towards the urban splendor in the distance. Another example could be a series of illuminated bridges arching across a dark river, their curves forming leading lines towards the city skyline.
Rule of Thirds for Night Photography
The rule of thirds is a classic compositional guideline suggesting that placing your subject off-center, at one of the four intersection points created by dividing your frame into thirds both horizontally and vertically, creates a more visually appealing and balanced image. This is particularly effective in night photography where the darkness can often make a centrally placed subject appear isolated or lost. Imagine a lone tree silhouetted against a star-filled sky; placing it at one of the rule of thirds intersections, rather than in the dead center, immediately adds a sense of depth and intrigue. Similarly, a moonlit building positioned according to the rule of thirds will feel more dynamic and engaging than one placed squarely in the middle.
Capturing Compelling Night Portraits
Night portraits present unique challenges and opportunities. Careful planning and execution are key to achieving stunning results.
- Lighting: Utilize available light sources creatively. This might include streetlights, neon signs, or even the soft glow of a nearby building. Consider using off-camera flash or continuous lighting to add fill light and shape your subject. Avoid harsh, direct flash; instead, opt for softer, more diffused lighting to create a more natural and flattering effect.
- Background: Choose a background that complements your subject. The blurred lights of a city at night can create a beautiful bokeh effect, adding depth and atmosphere to your portrait. Alternatively, a dark, uncluttered background will allow your subject to stand out.
- Composition: Apply the rule of thirds and leading lines. Consider using leading lines such as a street or a pathway to draw the viewer’s eye towards your subject.
- Exposure Settings: Use a tripod and a wide aperture (low f-number) to ensure sharp focus on your subject while allowing the background to softly blur. Experiment with ISO settings to balance image noise with exposure. A remote shutter release will help avoid camera shake.
Light Painting Techniques
Light painting is a creative technique involving moving a light source during a long exposure to create interesting patterns and effects. This can add a unique and artistic touch to your night photography.
A simple example involves using a flashlight to paint light trails across the night sky, creating abstract shapes and designs. More advanced techniques might involve using multiple light sources, colored gels, or even sparklers to create complex and dynamic compositions. The possibilities are virtually endless, allowing for highly creative and personalized expressions. Remember that practice and experimentation are key to mastering light painting.
Mastering night photography with a DSLR camera is a journey of learning and experimentation. By understanding your camera’s capabilities, mastering exposure settings, employing effective composition techniques, and utilizing post-processing tools, you can unlock the full potential of nighttime photography. Remember, practice is key. The more you experiment with different settings and compositions, the more confident and creative you will become in capturing breathtaking night scenes. Embrace the challenges, explore the possibilities, and let your creativity illuminate the night.
FAQ Overview
What is the best white balance setting for night photography?
The best white balance setting depends on the scene. For cityscapes, “Tungsten” or a custom white balance setting can often work well. For starry skies, “Daylight” or “Shade” might be more appropriate. Experiment to find what looks best.
How do I avoid blurry night photos?
Use a sturdy tripod, a remote shutter release, and a low ISO to minimize camera shake. Consider using a shorter shutter speed if necessary, even if it means a higher ISO and more noise.
What software is best for post-processing night photos?
Many options exist, including Adobe Lightroom, Adobe Photoshop, and Capture One. The best choice depends on your preferences and budget. Each offers powerful noise reduction and editing tools.
Can I use my phone’s flash for night photography with my DSLR?
No, a phone’s flash is generally too weak and the light quality is poor for illuminating subjects at a distance. Consider using an external flash or other lighting solutions designed for photography.
Explore the different advantages of water resistant and shockproof phone cases for outdoor adventures that can change the way you view this issue.
